This is a sponsored post written by me on behalf of The Duck Brand for IZEA. All opinions are 100% mine.
Thank you for visiting. This post may contain affiliate links to recommended products at no extra cost to you. Read our Disclosures and Terms of Use. Don't miss out again, become a Reader here <--it's FREE.
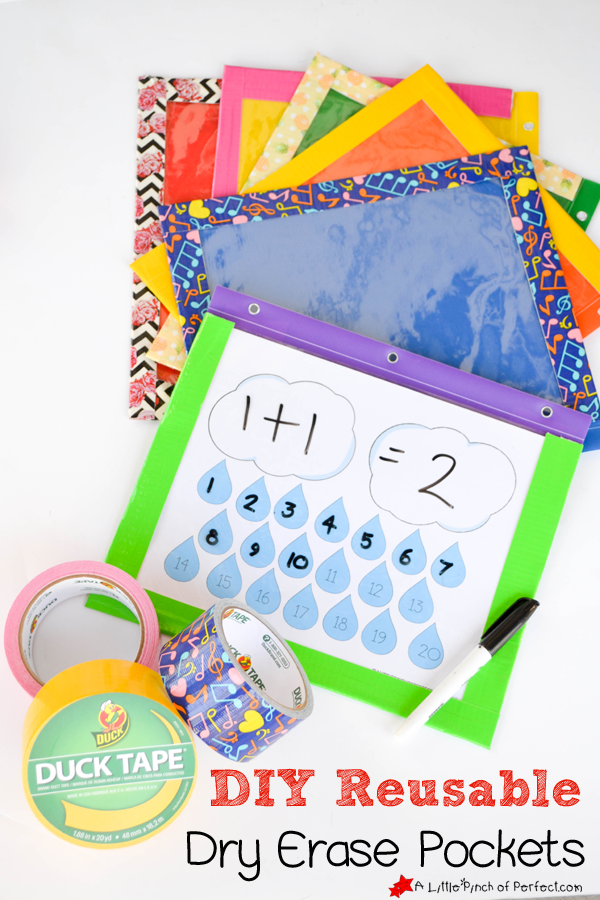
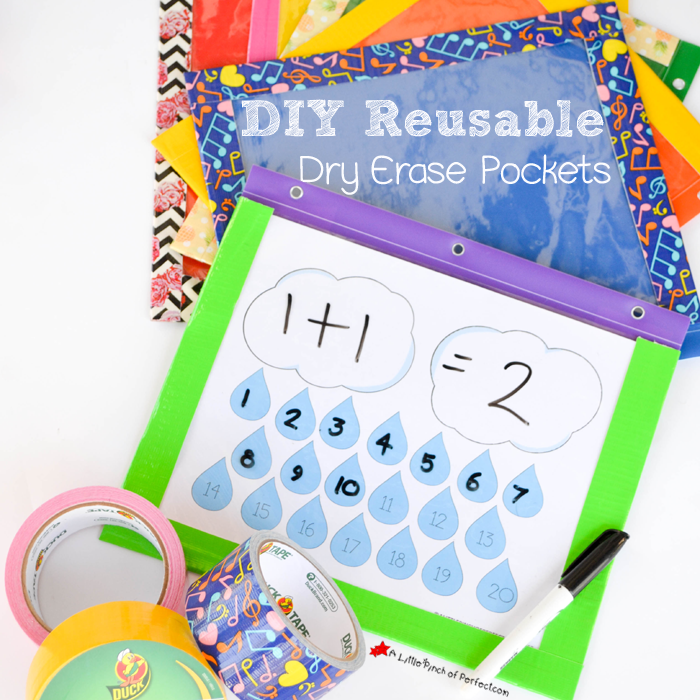
I have been dreaming about getting dry erase pockets for school time with the kids because laminating all our printables and activity pages takes time and is costly. When I saw the cute patterns by Duck Tape it occurred to me that I could use it to make cute and colorful DIY dry erase pockets without having to sew (yay!) They turned out great, were easy to make, and the kids love using them.
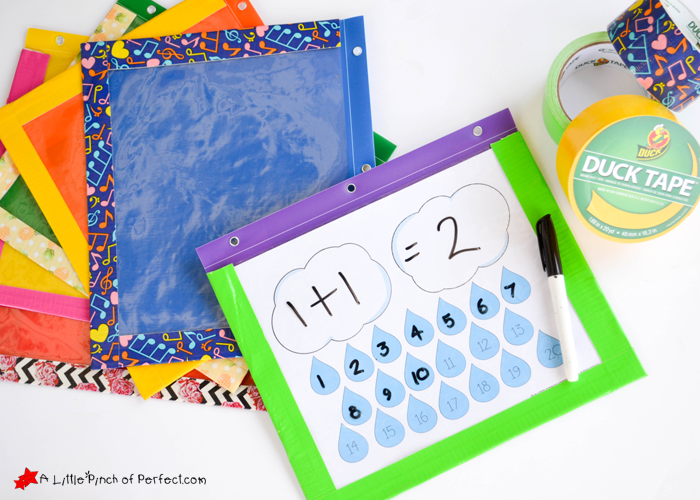
With school starting soon we are gearing up for lots of learning. Since we used Duck Tape, we didn’t need lots of other craft supplies making this DIY easy and inexpensive. Duck Tape comes in so many cute colors (200+) that you can personalize the pockets for your kiddo, classroom, or home.
Make sure to check out Duck Tape to see more DIY and crafts on Instagram, Twitter, and their School Craft board on Pinterest Thank you Duck Tape for sponsoring this post and supplying us with adorable Duck Tape!
 |
| Pin me please! 🙂 |
Supplies:
Duck Tape
Plastic file folder
Clear vinyl for crafts/sewing
Directions:
1. Cut the folder in half, then carefully cut off the inside pocket off. Cut a piece of vinyl the size of one piece of your file folder. Our piece of vinyl was 11.5″ x 9 in.

2. Line one side of the vinyl with Duck Tape, sticking one half of the tape to the vinyl and leaving one half hanging off so it can be wrapped around the file folder. The Duck Tape was easy to work with and I was even able to lift it up and reposition it to make sure it was straight before I pressed it down. 

Carefully place the file folder on top and fold the Duck Tape over to secure it in place. Repeat until 3 sides have been taped making sure to leave one side open so the activity pages can slide in. I left the side next to the holes open so we could use the holes to hang up our dry erase pockets and the activity pages wouldn’t fall out.

3. On the back of the dry erase pocket use a final strip of Duck Tape to secure the three sides, then your pocket is done!


I suggest testing any dry erase markers out on a small portion of the vinyl before you let kids write all over them just to make sure it will erase. I wipe our dry erase pockets clean before putting them away. I love how we are able to use printables over and over again! What other cool educational uses can you come up with for Duck Tape? Find Duck Tape here.
 |
| Pin me please! 🙂 |
Thanks for visiting with us today!
Have a great day!
Love, Katie & the Kiddos
Love this idea!! Where did you find the vinyl that you used?
Hi Cynthia, Thanks! I found it at Jo-Ann Fabric and Crafts. It is sold by the textile fabrics in an extra wide role so you don't have to buy very much to make a couple of pockets 🙂 .
This is such a brilliant idea! I wouldn't have thought to use Duck Tape. Love it! Thank you for sharing at Inspire Me Wednesday. Featuring you in this week's issue.
These look great! I love all the new bright Duck tape colours 😀
#Pintorials
This is such a great idea… and so easy to make! Love it!
Thanks so much and thanks for visiting!!!